
Herring under a fur coat is something I prepare every New Year, and each time it brings back the same feelings: warmth, comfort, and memories of family gatherings. It’s a dish that’s unmistakable – not just for its taste, but for how it looks. The deep purple beet layer, soft vegetables, egg yolks, and pieces of herring all form a unique composition known to everyone since childhood.
My recipe is the classic version with no unnecessary tweaks. The foundation is good-quality herring fillet, which I always check: it should not be too salty, should be tender, and free of bones. I grate each cooked vegetable separately and separate the egg whites from the yolks. I always treat the onion – either with boiling water or a light marinade – to remove the bitterness. And I always leave the salad in the fridge overnight – otherwise, it won’t soak through properly, and the layers won’t meld together.
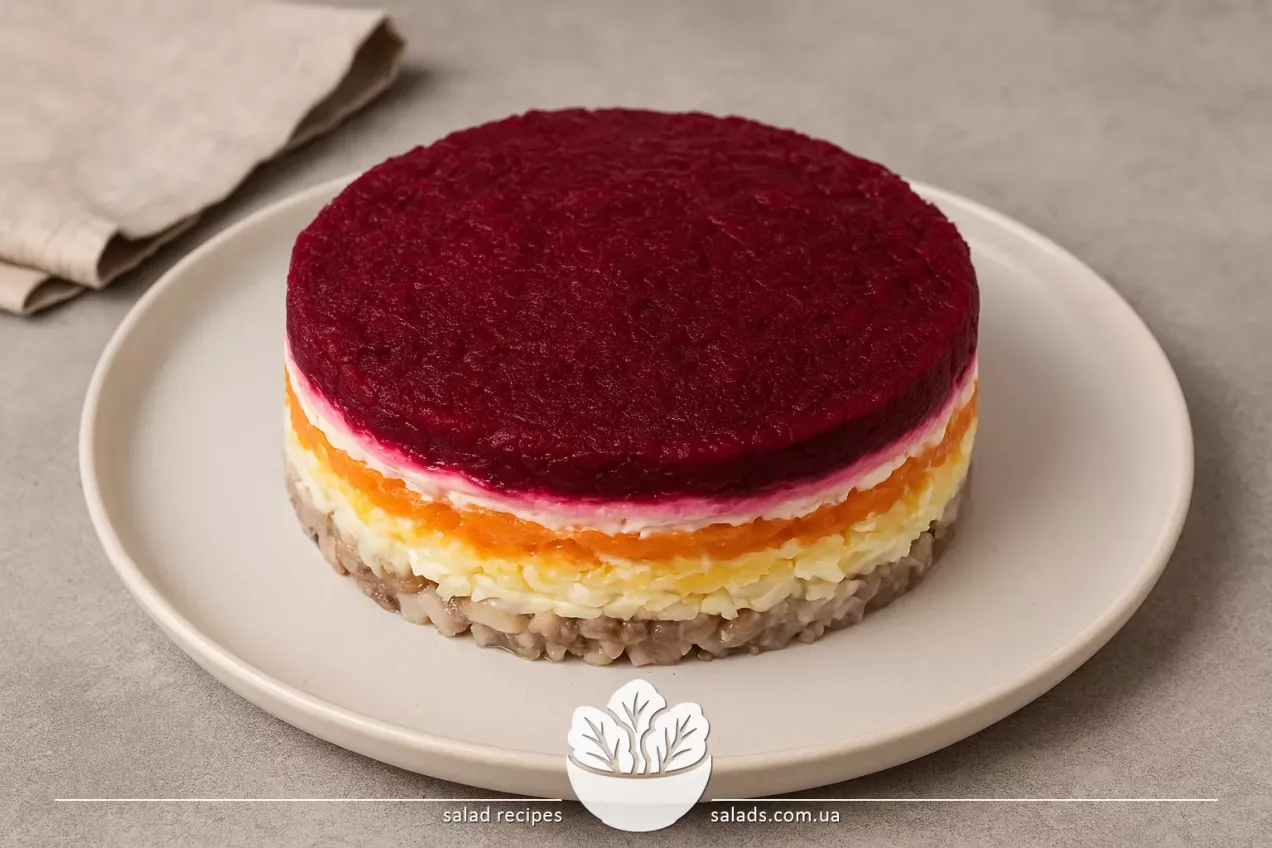
You can shape this salad like a cake, in rings, or just in a salad bowl – it always looks impressive. And if you decorate it with herbs or a bit of egg yolk – it becomes even more festive. Herring under a fur coat is more than just food; it’s a part of our holiday culture that I happily preserve and prepare again and again.
Ingredients for Herring Under a Fur Coat
How to Make Herring Under a Fur Coat
Prepare the Vegetables and Eggs
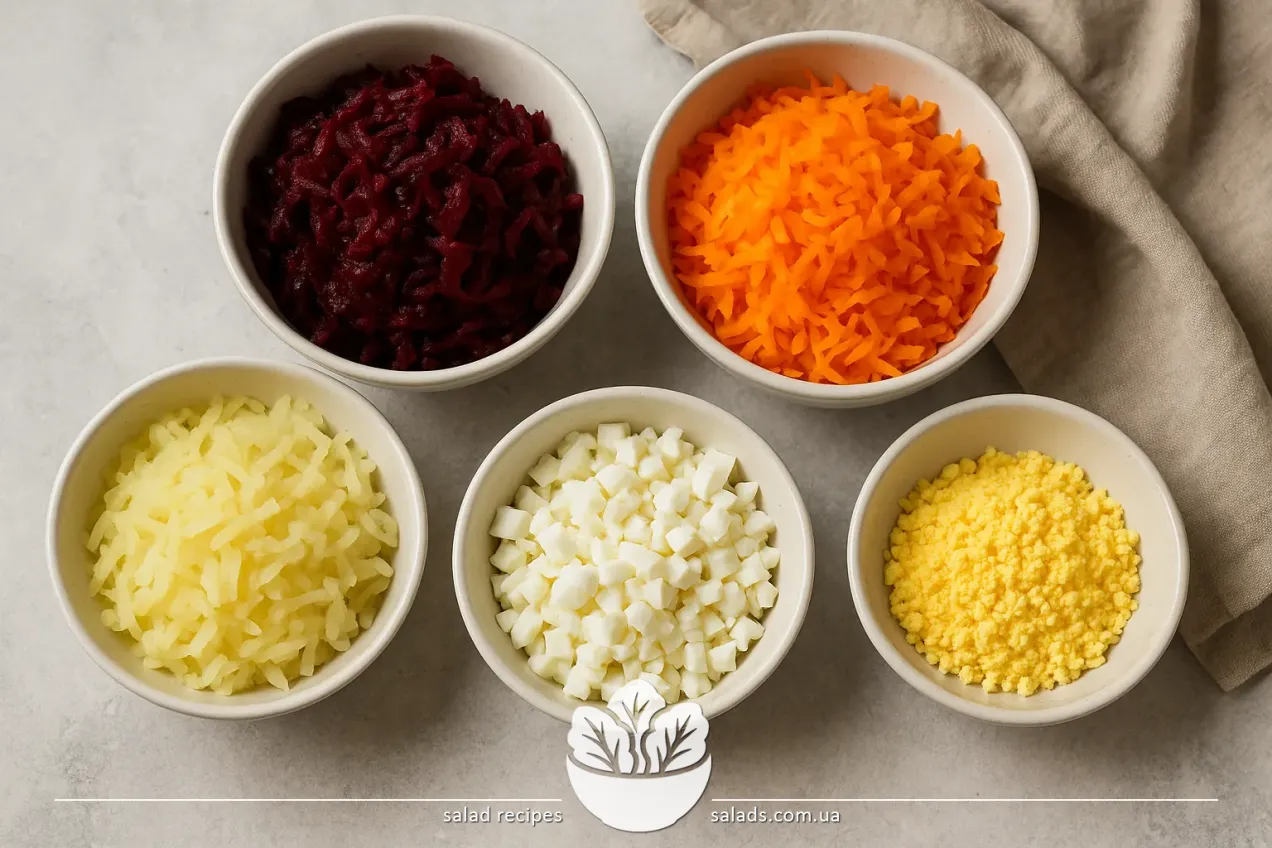
I boil the potatoes, carrots, and beets separately – that way, each vegetable keeps its flavor. I hard-boil the eggs – for at least 10 minutes. Then I cool everything, peel, and grate each ingredient separately: beets, carrots, potatoes, whites, and yolks. This makes it easier to layer and helps the salad keep its structure.
Dice the Herring
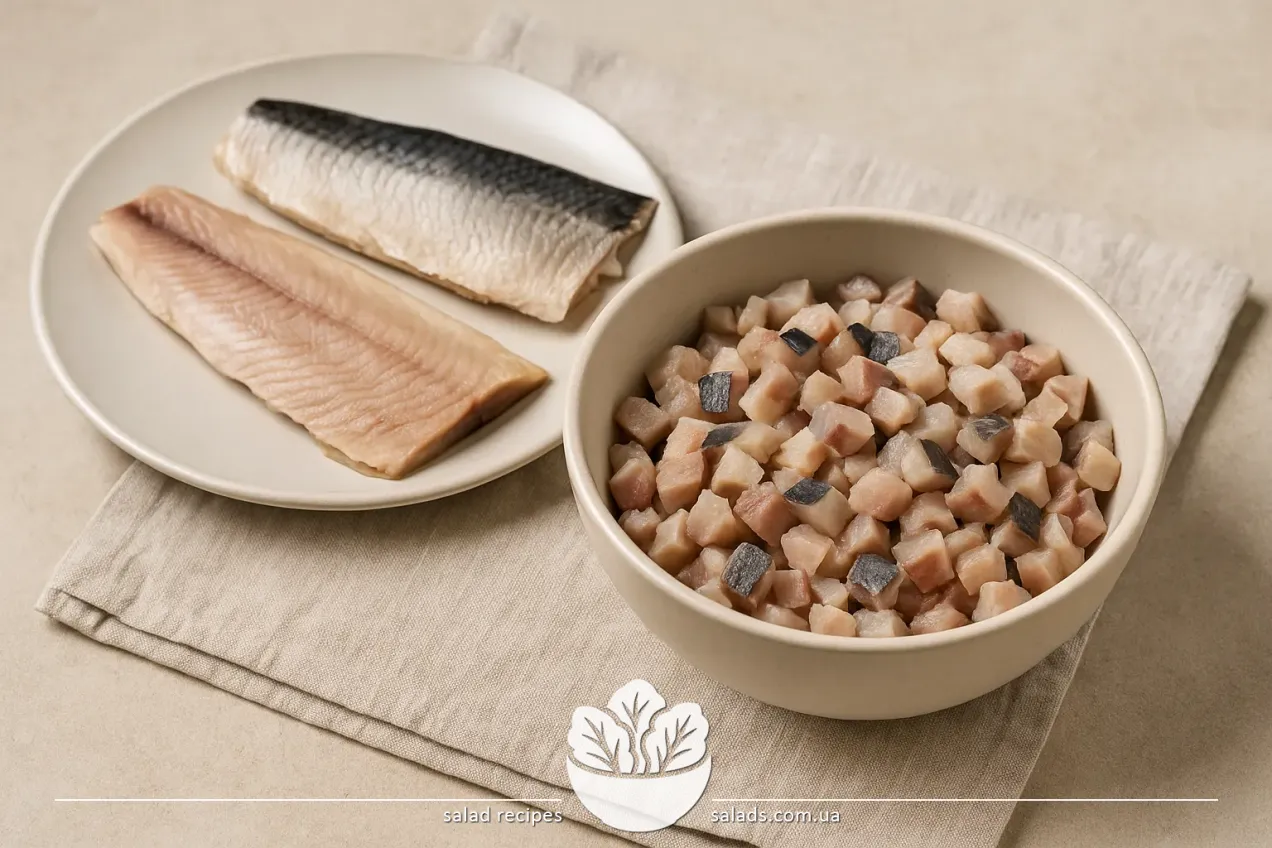
I carefully remove the skin and bones from the herring fillets. Then I cut them into small cubes so the fish is evenly distributed in the layer. If the fillets are too salty, I soak them for a few minutes in milk or lightly drizzle with lemon juice – this softens the flavor and adds depth.
Treat the Onion
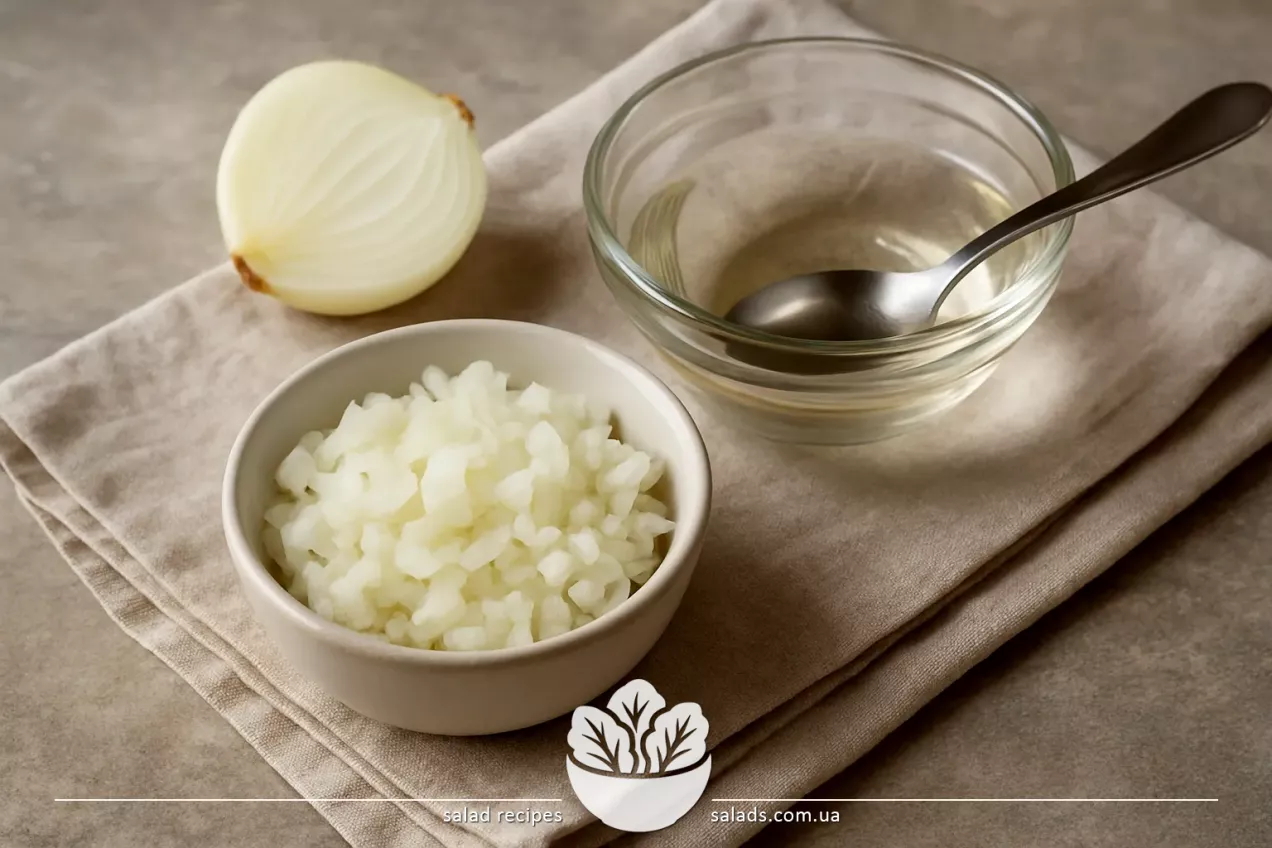
I chop the onion very finely – almost like for vinaigrette. Then I pour boiling water over it or soak it in apple cider vinegar for 10 minutes. This removes the bitterness while keeping the distinctive aroma. After that, I drain the liquid and lightly dry the onion in a sieve.

Layer the Base
I start with a layer of herring at the bottom of the dish, then add the prepared onion. Next come the potatoes, a pinch of salt, some pepper, and a layer of mayonnaise. I gently press each layer with a spoon, but don’t compact it – the salad should remain soft. Using a spoon or gloved hands makes the layers nice and even.
Finish with the Beet Layer
After the potatoes, I add the carrots, mayonnaise, egg whites, another thin layer of mayonnaise, and then the grated beets. I also spread a very thin layer of mayonnaise on top – just enough to balance the flavor. Sometimes I reserve some yolks to sprinkle on top – it looks festive and tidy.
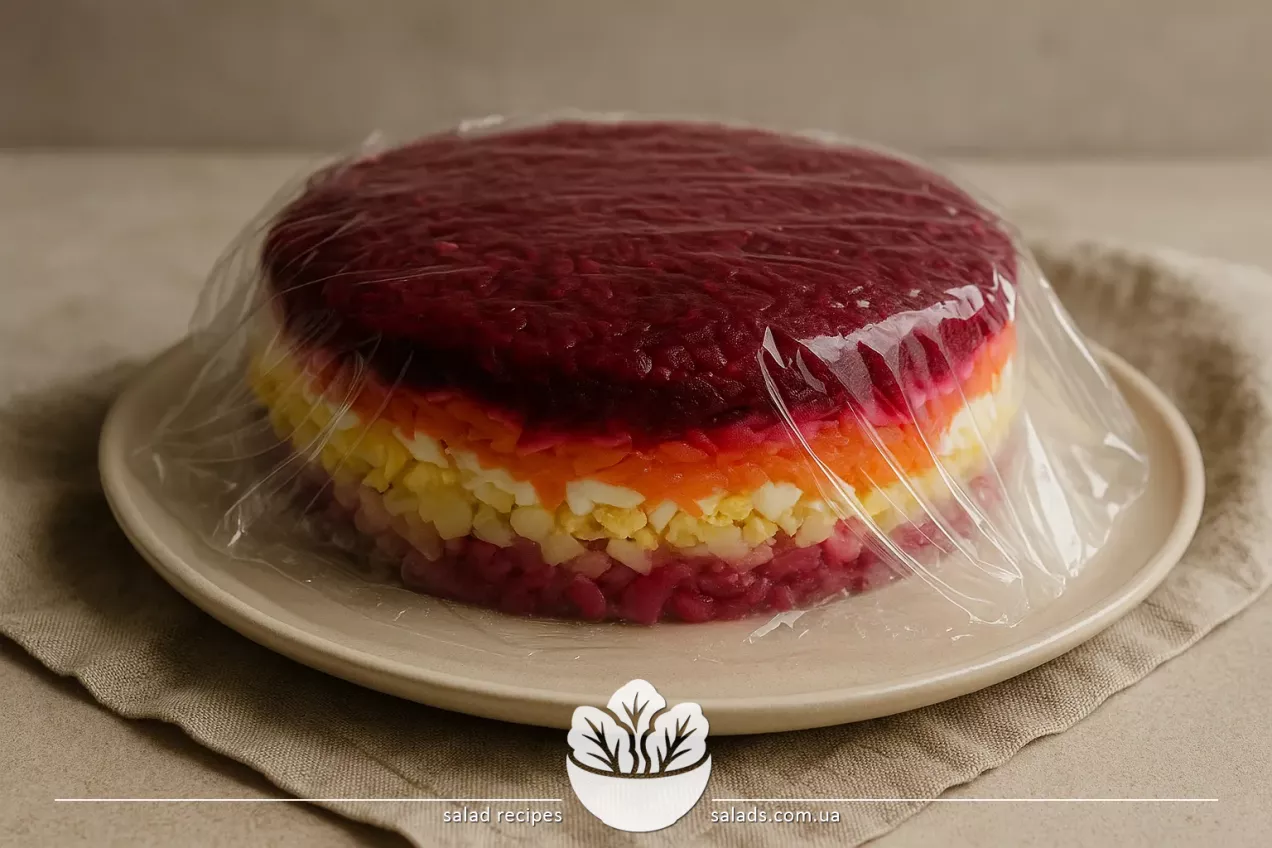
Let the Salad Rest
I cover the finished salad with plastic wrap or a lid and place it in the fridge for at least 6 hours, preferably overnight. During this time, the flavors meld and the structure becomes stable. By serving time, the salad is tender, juicy, and holds its shape well when sliced.
Tips
-
To keep the beets from staining all the layers, I grate them last using a separate grater. That way, the other ingredients keep their color, and the salad looks neat. You can also lightly blot the beets with a paper towel.
-
If you want the herring to taste milder, soak the fillets for 5-10 minutes in milk. This reduces the saltiness and improves the texture. I often use this method when making the salad for guests.
-
Don’t use too much mayonnaise between layers – it’s better to spread it thinly but evenly. I always use a spoon or piping bag – it makes it easier to control the amount and avoid excess richness.